This section describes the common user interface elements used throughout the program.
The Main Window
The Asset Manager window is divided into 4 main areas: the Menu Bar, the Navigation Tabs, The List View, and the Navigation Folders.

Main Window (with Asset tab selected)
The Menu Bar
The menu bar contains the File, View, Tools, and Help menu items.

Menu Bar
More information on each of these menu items is available by going to the Reference section here.
The Navigation Tabs
The Navigation tabs allow you to easily switch between the Assets, Personnel, Vendors, and Reports sections.
Navigation Tabs
More information on each of these tabs is available by going to the Reference section here.
The List Views
The list views display the data in a spreadsheet-like view of rows and columns.
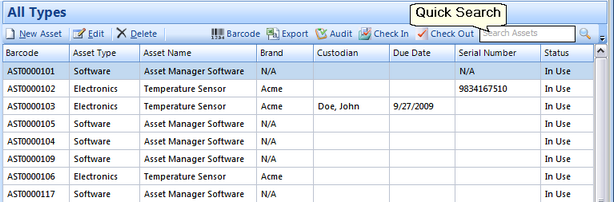
List View
| • | The toolbar just above the list view contains buttons to add/edit/delete records in the list view. |
| • | Records can also be opened by double-clicking on a row or right-clicking on a row and selecting the Edit menu item. |
| • | Sort the data by any of the columns in the list view by clicking on the header for that column. Click again to reverse the sort order. |
| • | Change the order of the columns in the list view by clicking down on a column header and dragging it while holding the mouse button down. Then release the mouse button to drop it in a new location. |
| • | Filter the data displayed in the list view by entering a few characters in the Quick Search box. |
| • | Right-click on the list view and select Show Columns to select which columns are displayed in the list view. |
The Navigation Folders
The Asset list view and the Personnel list view both contain navigation folders on the left side of the screen. These folders allow you to organize the data into groups and quickly filter the list by clicking on a folder. You may create new folders by right-clicking on the navigation folder area and selecting the "New" option from the menu. Or, rename an existing folder by right-clicking on the folder and selecting the "Edit" menu option.
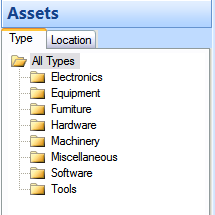
Navigation Folders
Date Fields
The date fields on the data entry forms contain a calendar field to ensure that the date gets entered into the database in the correct format. This field has several features:
|
 Date Field (with pop up calendar) |
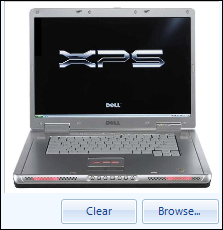
Picture Fields
Picture fields allow you to add a picture to a record. This field is available on the Asset and the Personnel forms.
Picture Field
| • | Click the Browse button to select a picture file from your computer. Picture files may be .jpg, .jpeg, .gif, .tif, .bmp, or .png. |
| • | You may also add a picture by dragging it from the Windows Explorer window and dropping it in the picture box. |
| • | Adding a new picture will overwrite the current picture. |
| • | Click the Clear button to remove a picture. |
Attachment fields allow you to add multiple attachments to a record. The file attachments may be of any type, and they will be stored in the database.
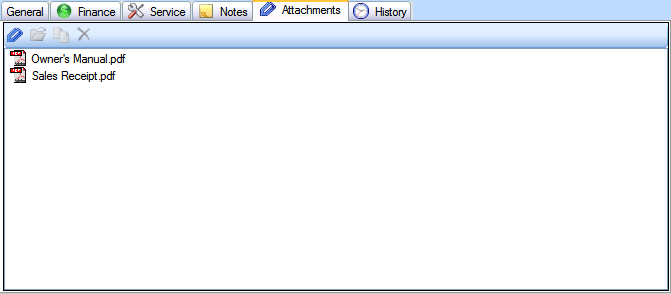
Attachment Field
| • | Drag and drop files onto the empty space in an Attachment field to add them to the record. |
| • | Or you may click the Attachment icon in the toolbar to select a file to add. |
| • | Double-click a file in the attachment field to open it. |