This section describes the common user interface elements used throughout the program.
The Main Window
The Vehicle Manager main window is divided into 4 main areas: the Menu Bar, the Navigation Buttons, the Vehicle List, and the Sub Tabs.
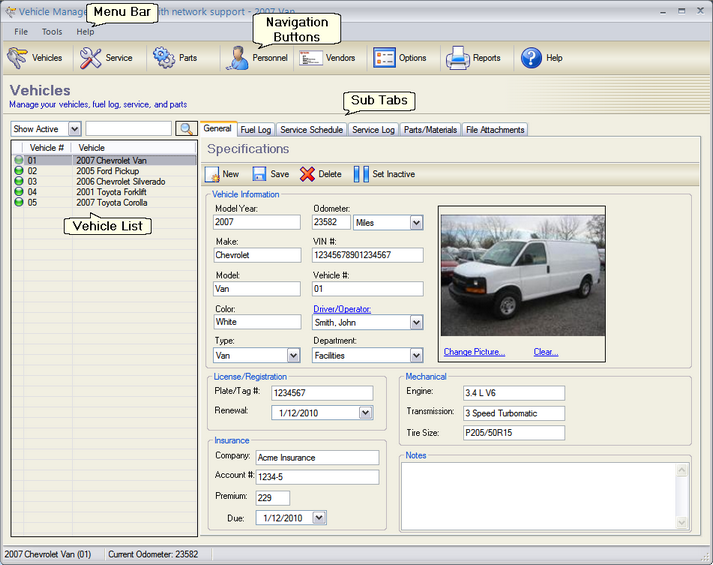
Main Window (with Asset tab selected)
The Menu Bar
The menu bar contains the File, Tools, and Help menu items.

Menu Bar
More information on each of these menu items is available by going to the Reference section here.
The Navigation Buttons
The Navigation buttons allow you to easily switch between the Vehicles, Service, Parts, Personnel, Vendors, Options, Reports and Help sections.
Navigation Tabs
More information on each of these tabs is available by going to the Reference section here.
The Vehicle List
The vehicle list view displays the list of vehicles in the database.
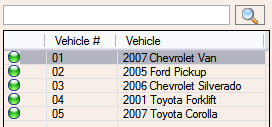
List View
| • | Search for a vehicle using the search box at the top of the list. |
| • | Or select a vehicle by clicking on the row containing the vehicle. |
| • | Sort the data by any of the columns in the list view by clicking on the header for that column. Click again to reverse the sort order. |
| • | The Green/Yellow/Red status indicator provides the overall service status for the vehicle based on the service schedule. |
Sub Tabs
The main Vehicle screen contains the following Sub tabs: General, Fuel Log, Service Schedule, Service Log, and Parts/Materials.
Navigation Folders
Date Fields
The date fields on the data entry forms contain a calendar field to ensure that the date gets entered into the database in the correct format. This field has several features:
|
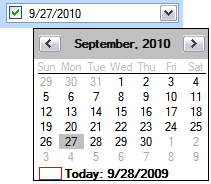 Date Field (with pop up calendar) |
Picture Fields
Picture fields allow you to add a picture to a record. This field is available on the Vehicle and the Personnel forms.
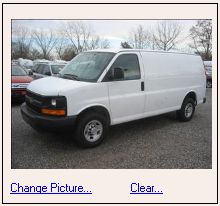
Picture Field
| • | Click the Change Picture link to select a picture file from your computer. Picture files may be .jpg, .jpeg, .gif, .tif, .bmp, or .png. |
| • | Adding a new picture will overwrite the current picture. |
| • | Click the Clear link to remove a picture. |